

How This Nighttime Cleansing Routine Got Me to “Glass Skin,” Even Without Exfoliation
Yes, it’s possible. The cleansing master lets you in on his nighttime cleansing secret.
If y’all missed the previous cleansing article where I talked (excessively) about morning cleansing, I’d go read that first so you can at least partially understand why I am so fixated on washing my face. If you’ve already taken the time to read it, thank you, welcome back.
But for those of you who may feel like it’s a lot of hubbub about something seemingly so basic, I really encourage you to take a look and spend some extra time considering your cleansing routine. It’s the first major thing that made a noticeable change in my skin, and once I started taking my time with my nighttime cleansing routine (quite literally as I’ll explain below), I’ve found that I actually don’t need as many toner layers as before and have been able to dial back my exfoliation. I would have never thought that proper cleansing would result in either of those things, and I’m still in a bit of disbelief over the results. But I also will never go back to hastily washing my face again.

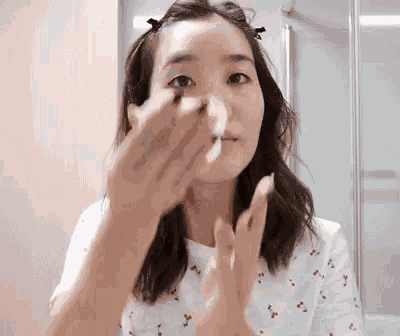
Step 1: Color cosmetic removal
Where your cleansing routine starts depends on what’s on your face that particular night. If you’ve got on eyeshadow, lip product, or any type of waterproof cosmetics like eyeliner or mascara, this would be where I’d recommend you begin.
Yes, remove those lips and eyes
I’m a big proponent of removing your eye makeup and lip product separately from the rest of your face. If you had a day where you went really natural with the color cosmetics and just have on a bit of lip gloss and a sheer wash of eyeshadow, then you may be able to remove everything at once along with your base makeup. But if you’re in the camp of long-wearing lip colors and aforementioned waterproof eye makeup, I think it’s worth the extra time to use a few cotton pads and what we Koreans frequently refer to as “lip and eye remover” (I’ve always found the name a bit horror movie-esque) to thoroughly remove that stuff first.
A bi-phase type of product that you shake to combine separate water and oil layers, like the Mamonde Micro Lip and Eye Remover, is what I’ve found works the best. However, after you saturate your cottons rounds with the product, please for the love of all that is good and chok chok in this world, do not smash them into your eyes and rub. If you take the dampened cotton and hold it against your eyes and lips for about 10 seconds, it will give the remover a chance to do its thing and break down your makeup.
Don’t skimp on the cotton rounds
Also, this isn’t the time to be frugal with your cotton rounds. Please do not go back and forth between your lips and eyes; not only are you not doing the best job of removing your makeup, but by doing so, you are risking a lot of irritation by rubbing ingredients that aren’t approved for use around the eye from your lips and vice versa. Trust me, I’ve seen someone get a legit eye infection from getting liquid lipstick in their eye doing this. I’d rather you have to buy more cotton rounds rather than antibiotics. I’ve also had friends solve their breakouts around their mouths by separating their cleansing steps and not smushing their lipstick around their face with a cleansing oil trying to remove everything at once.
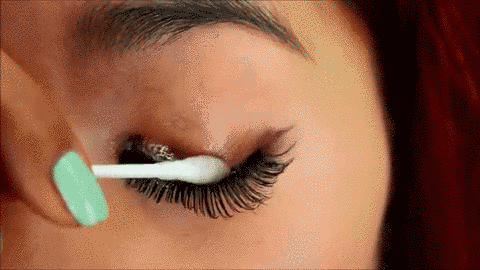
Finish with a cotton bud
Pro tip: If you’re wearing false lashes and/or have remaining mascara or eyeliner hanging around after your first pass, a cotton bud soaked with the same makeup remover is the perfect thing to get any remnants out of your waterline, the base of your eyelashes, and glue off of your falsies so you can squeeze another use out of them.
Step 2: Base makeup removal
Once you’ve got your color cosmetics off, it’s time to dissolve the rest of your makeup off. If you’re wearing just sunscreen, I’d also recommend you take the time to remove it separately as well. In my book, it doesn’t matter if it’s foundation, concealer, or sunblock — anything that’s meant to stick to my skin for an extended period of time needs to get removed on its own to make sure I don’t have any unwanted guests hanging around when I go to do my final cleanse. We don’t want to see any makeup or other residue rubbing off on our towels after cleansing.
Cleansing oil vs. water
Cleansing oils have been my choice for several years now, and no matter how many times I sing their praises, there are people who are really concerned that they will clog their pores, that the oil will not rinse off properly, or that they’ll find the feeling of rubbing oil all over their face to be uncomfortable. You could opt for a cleansing water and cotton rounds, but nothing quite does it like a cleansing oil for me.
Balms and oils are also a big staple in the European cosmetic scene as well as Asia, but the fact that Asian cleansing oils and balms take off everything with ease, emulsify into that iconic milky texture with just a splash of water, and rinse away completely clean makes them so easy for me to use. The European style ones that don’t emulsify like this have to be removed with a washcloth. Having used both, I can say that I didn’t notice any benefits from using the non-emulsifying kind. I’m just left with more laundry. No thanks.
Take the time
Now if you’re on the cleansing oil train, here’s where I’m going to ask you to take a little detour. I’m sure some of you fellow cleansing aficionados are already doing this, but the majority of people do not take enough time to wash their faces. For me, I find that the sweet spot is between 60 and 90 seconds of massaging cleansing oil into my face and spending 30 seconds rinsing it off. I know some of you out there are rubbing in your cleanser for 10 seconds and then moving along, but I really urge you to try and take a (literal) minute or two actually cleansing your face. This is a good opportunity to get a little facial massage action in to help take up the full amount of time.
Step 3: The final cleanse
After you emulsify and rinse off your cleansing oil, rinse and repeat. Literally. On an indoors day where I haven’t left the house and therefore didn’t apply sunscreen, this is where I start my cleansing process. Just like the previous step, take your cleanser (which I am sure is low pH) and give your face another 60 to 90 second cleanse and a very thorough rinse of 30 seconds.
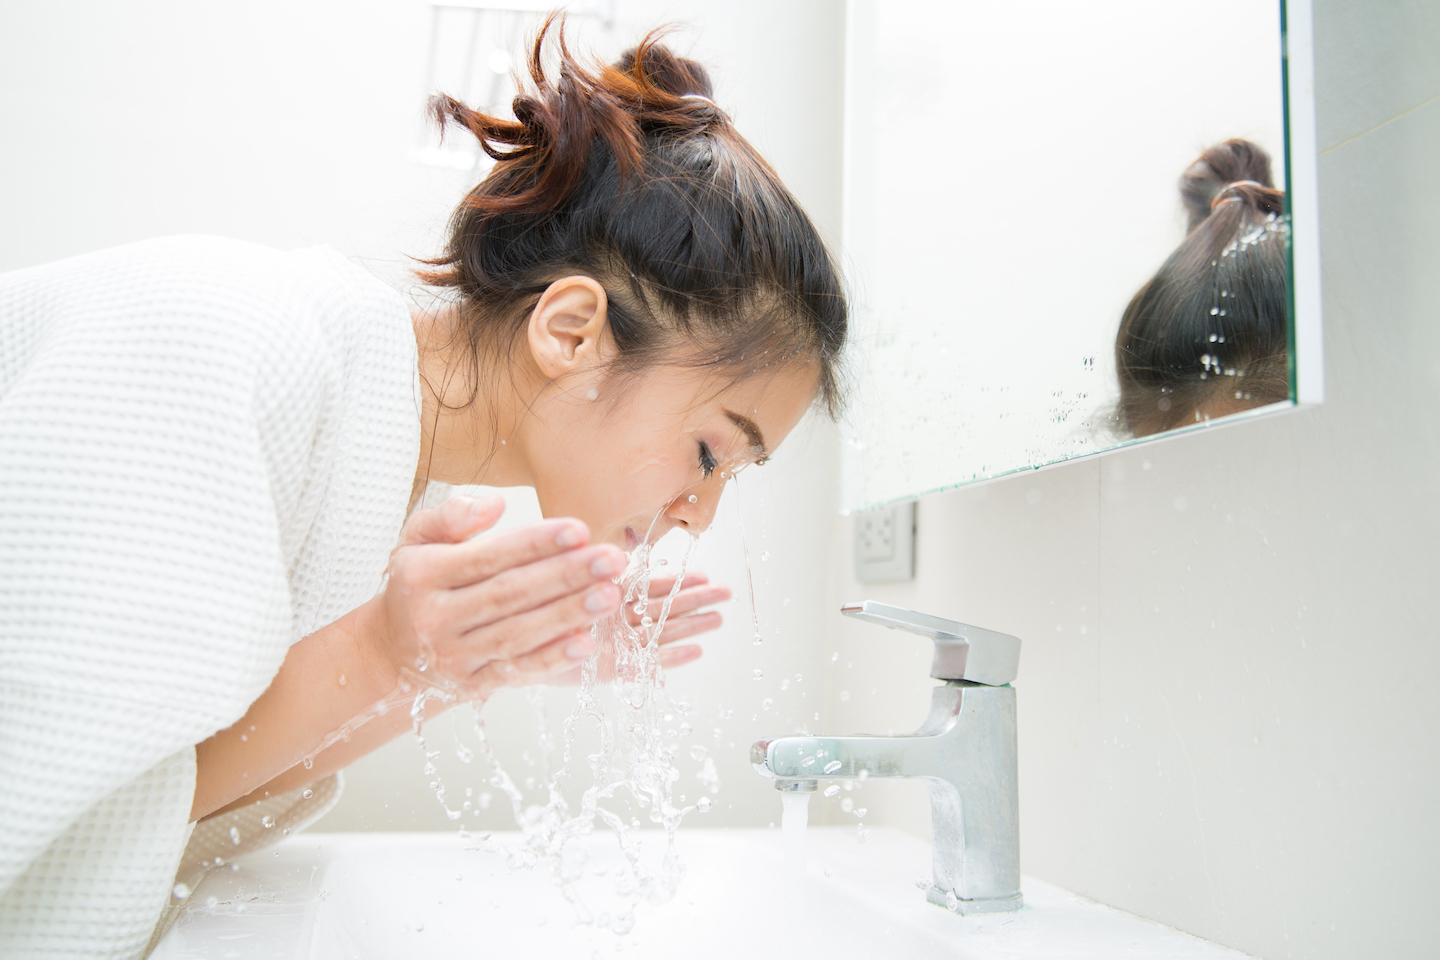
A note about water temperature
I do my nighttime cleansing in the shower, and if you’re in this group, you need to make sure that your shower is not screaming hot. I used to love super hot showers, but I’ve slowly gotten myself used to near room temperature water, and this is an absolute must if you’re rinsing your face under the running shower. Ultra hot water, while it feels nice, can cause unnecessary inflammation, irritation, and dehydration. The rare occasion where I’m washing my face at the sink results in me splashing my face between 10 and 15 times with water.
After adopting this nighttime cleansing method and, in particular, giving my cleanser time to really break down all the nasties on my skin and rinsing everything off properly, the change in my skin was pretty notable in terms of its overall softness and texture. In combination with my facial massage I’ve been incorporating, my skin definitely has more of that “glassy” appearance, and I’ve actually scaled back on my exfoliation because I feel like I just don’t need it.
As much as I love my acids, I want to use them at the lowest frequency and strength as possible to get the results I’m looking for. Overachievement in this category does not get you any awards, people. If I had known I could’ve achieved results like this with my existing cleansing products, I would have saved myself a lot of grief from all the times I’ve over-exfoliated the crap out of my face and made an absolute mess out of my moisture barrier. In regards to this, don’t follow in my footsteps. Just meet me at the destination, y’all.
What does your nighttime cleansing routine look like? Will you be changing anything now that you know my secret?
Loading...